


If you are going to install PHP, Apache, phpMyAdmin, and MySQL on your local computer, you can download and configure each one separately but it's a little time consuming and can be painful to get them all set up and working correctly. This is probably more true for Windows than Linux because in Linux you can easily install things with a package manager. But then again different distributions of Linux tend to have little variations in how they do things - including different package managers - which can add some confusion.
Fortunately, Friends of Apache have done all the legwork and created one package that installs and configures these on your local machine. If you read the introduction by XAMPP, they write, "Many people know from their own experience that it's not easy to install an Apache web server and it gets harder if you want to add MySQL, PHP and Perl". For the remainder of this post I'll be talking about installing on Windows since I think that's where XAMPP adds the most value.
You can download the current Windows version of XAMPP 1.7.4 from here. You'll get:
- Apache 2.2.17
- MySQL 5.5.8
- PHP 5.3.5
- phpMyAdmin 3.3.9
- FileZilla FTP Server 0.9.37
- Tomcat 7.0.3 (with mod_proxy_ajp as connector)
STARTING XAMPP
Via the Windows start menu, start XAMPP. If it's not in your start menu, then from Windows Explorer navigate to the Install directory and find XAMPP-control.exe and drag a shortcut to your desktop or Start Menu. Ok, that should get you covered. Here's what the control panel looks like:

I do not click on the Service checkboxes because I do not want to start Apache and MySql everytime I start my machine. I'd rather do it manually, when I need it. To start Apache and MySql, click the Start buttons next to them. In a new tab in your browser, type in localhost. If Apache started successfully, you will get the XAMPP main page.
SECURITY SETTINGS
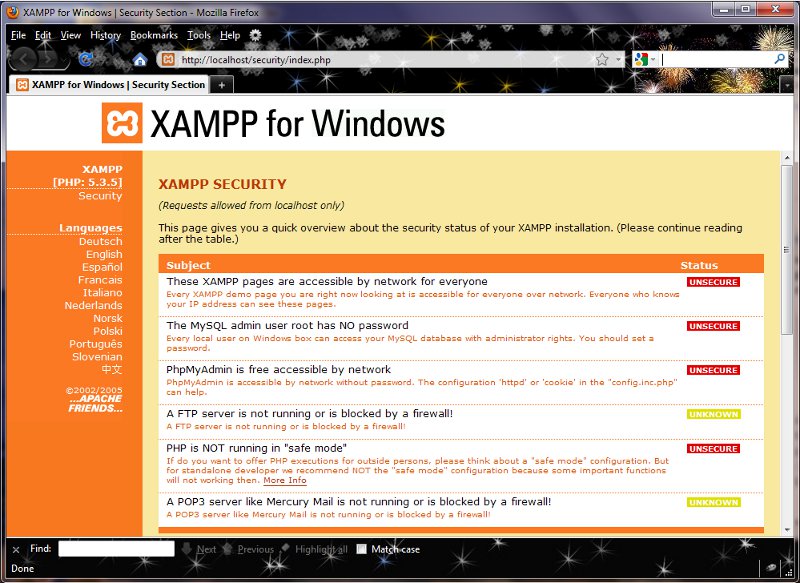
Since you are now running both web server and MySQL processes on your computer, you should setup some security so that someone from the Internet doesn't connect into these servers when you really only need them for your local use. On the XAMPP control panel click on Security. You'll get a page like this one.
Now click the link further down that page for fixing the security settings and follow the directions. It'll have you specify a MySQL root password and a username/password for your local XAMPP pages as well. Don't forget the passwords that you use, as you will need them later.
WHERE TO PUT YOUR CODE
Now you are ready to start coding but you want to put your code in a place where Apache can find it. This directory happens to be "c:\xampp\htdocs\" (your path may vary, depending on where you installed XAMPP). I always create a subdirectory under that called "\EclipseWorkspace\". You can call it anything you want such as "\myprojectX\".
To edit your code, you need a programmer's text editor or an IDE, an integrated development environment. You can use the Eclipse IDE which has become an industry standard, but you can also use Notepad++ which is written in C++. I don't know what happened to Brief, I once saw it in an unrecognizable form on a Borland product. I think they made their money and are now sipping margaritas down in the Caribbean. For this post, I'm going to use Notepad++. You can download it from here. One advantage of Notepad++ is that it comes up fast compared to Eclipse. And unlike Eclipse, it does not drive you crazy when you want to reset its colors.


Post a Comment
Note: Only a member of this blog may post a comment.