


One of my readers sent me a question about a past article, Semi-transparent Image Captions, asking for more detail on how to use it. His inquiry got me thinking because I realized that you'd have to supply and hardcode widths for every image, and of course, write the markup necessary every time you want to caption an image. I thought it'd get tiring to have to repeat those steps with a lot of images, especially if you had images of varying dimensions.
My blog is about teaching CSS which is why I've always tried to stay true to CSS as you will remember from the bar graphs of summer. But this is an example when it's Ok to bring in outside help because CSS falls short. Parameters that are out of reach of CSS are accessible through Javascript - for example, the ability to dynamically determine the width of an image that has been loaded from the server.
So we will write CSS plus some Javascript to handle this project. If you are not interested in learning Javascript, I completely understand and want you to know that you don't have to learn or even understand it for the purposes of our exercise. You can simply include the Javascript file that I'm going to give you in your markup (template for Blogger folks) and be done with it. On the other other hand, If you have a programming background or have an interest then you will find Javascript an easy to learn language and you can join me when we explore its syntax in a later post. Either way we are not here to become Javascript experts but know enough to get the job done.
Let's get started: Markup for captioned images will be based on an img tag with multiple classes. I'll specify the path to the image file and alt text exactly like you would in a regular img element. But, I'll assign a special class name, which will tell the Javascript to replace the original img markup with the markup needed to display a caption with transparent background at the bottom of the image.
The script will figure out the width of each image, grab the alt text for use in the caption, boldface any text that comes before a colon in the alt text, account for any padding the img may have, optionally center the image, and output the necessary XHTML.
Original Markup:
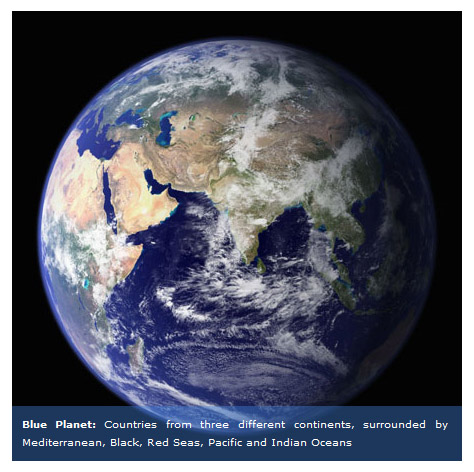
<img class="cssbakery_caption white cc" src="earthround.jpg"
alt="Blue Planet: Countries from three different continents, surrounded by Mediterranean,
Black, Red Seas, Pacific and Indian Oceans" />
The Javascript processes our original markup above and transforms it into what you see below. Note that the values, 450 pixels for width and 4 pixels of padding have all been calculated by the script. The Javascript output:
<div  class='cssbakery_image_wrapper  white cc' style='width:421px'>
<img src='http://pics.cssrule.com/pics/earthround.jpg' />
<div class='cssbakery_transbox'
style='background-color: white; left:4px; bottom:4px;'></div>
<p style='left:4px; bottom:4px;'><strong>Blue Planet:</strong>
Countries from three different continents, surrounded by Mediterranean,
Black, Red Seas, Pacific and Indian Oceans</p>
</div>
This markup is what produced the white captioned Earth image at the top of this post. You may be wondering where the rounded corners came from. The picture already had rounded corners. We are putting out the caption as a white rectangle but the background of my site also being white, they blended together and I did not lose my rounded corners. You would if you tried the transparency technique with any other color than white. If you want to learn how to round the corners of an image in Adobe Photoshop, please see this previous post.
JAVASCRIPT
Javascript is becoming more and more important in Web programming as it is really the programming language of the Browser. Javascript adds dynamic behavior, while HTML provides the content, and CSS the presentation. There are many Javascript libraries out there to make the job easier, and my favorite is jQuery. With jQuery you can use your knowledge of CSS selectors to target the elements you want to operate on, while keeping the Javascript code separated from the HTML markup.
Using jQuery you can easily access and change the CSS of an element, add or delete class names, or even completely re-write the HTML of an element. That's what we do with this script. The original img tag gets replaced with new markup that includes an outer div, a new img tag, another div to render a transparent rectangle, and a paragraph tag for the caption text itself. The caption text gets pulled out from the alt attribute of the original img tag. I’ll publish another post soon going into the details of this script, for those of you interested in the Javascript/jQuery plumbing.
/*
CssBakery.com Captions - Javascript File
*/
$(document).ready(function(){
var cssbakery_colors = { medblue: '#4084e1', tealblue: '#3fbff4', marineblue: '#3f3ff4',
twig: '#855434', eggplant: '#5d2f4d', violet: '#c261e2', darkpink: '#e261a4'};

$("img.cssbakery_caption").each(function() {
var theid = $(this).attr('id');
var saveclass = $(this).attr('class').replace('cssbakery_caption','');
var theclass = ' '+saveclass+' ';
theclass = theclass.replace(' cc ','');
theclass = theclass.replace(/ /g,''); // note use of global replace
if (theclass === '') theclass='black';
if (!(typeof cssbakery_colors[theclass]=="undefined")) {
theclass = cssbakery_colors[theclass];
}

var src = $(this).attr('src');
var caption = $(this).attr('alt');
var idx = caption.indexOf(':');
if (idx >= 0) {
caption = "<strong>"+caption.substr(0,idx+1)+"</strong>"+caption.substr(idx+1);
}
var w = $(this).width();
var pb = $(this).css('padding-bottom');
var pl = $(this).css('padding-left');
if (theid !== '') {
theid = "id='"+theid+"' ";
}
var markup = "<div "+theid+" class='cssbakery_image_wrapper "+saveclass+"'
style='width:"+w+"px'>\n<img src='"+src+"' />\n<div class='cssbakery_transbox'
style='background-color: "+theclass+"; left:"+pl+"; bottom:"+pb+";'></div>
<p style='left:"+pl+"; bottom:"+pb+";'>"+caption+"</p></div>";

$(this).before(markup).remove();
$('.cssbakery_image_wrapper').children('p').each( function() {
var h = $(this).height();
$(this).siblings('div').height(h+20);
});
});
});
And here's the CSS that goes along with the script for styling of the markup that the script generates:
/*
* CssBakery.com Captions - CSS Style File.
*/
.cssbakery_image_wrapper {
height: auto;
margin: 0; padding: 0;
font: .75em/1.75em Verdana, sans-serif;
position: relative;
}

.cssbakery_transbox {
margin: 0; padding: 0px;
opacity:0.4;  filter:alpha(opacity=40);
position: absolute;
width: 100%;
height: 5em;
}

.cssbakery_image_wrapper p {
margin: 0; padding: 10px;
color: white;
font-size: 0.85em;
position: absolute;
}

.cc {
margin-left: auto;
margin-right: auto;
}
/* example client code: */
#flower, #img2 { margin: 20px; }
#flower .cssbakery_transbox {
background-color: pink;
}
OPACITY
Just to recap opacity feature which we had covered before: I have two statements for opacity, "opacity:0.4" is for Firefox which accepts values in the range of 0 to 1.0, 1.0 for the most opaque effect. Values between 0.4 through 0.6 seem to work best for our purposes. 0.6 is more opaque and thus darker. I chose 0.4.
For Internet Explorer, opacity property syntax is slightly different and the values range from 0 to 100. I used, "filter:alpha(opacity=40)" which is a middle of the range value.
HOW TO USE THE CAPTIONING TOOL
If you want to use this script, there are two ways to go about it. You can either copy and paste, or link to my script and css files. I recommend that you copy and paste, so that you won’t depend on my server being up, and that’ll save me a bit of bandwidth as well.
STEP 1
Either way, you will need to pull in the jQuery library from somewhere. Google hosts the library on their servers, so you can pull it from them like this:
<script type="text/javascript"  src="http://jqueryjs.googlecode.com/files/jquery-1.3.2.min.js">
</script>
Then paste my script into a script section of your page:
<script type="text/javascript"
(Paste my script that you see earlier in this post.)
</script>
Then paste my CSS into the css section of your page:
<style type=”text/css”>
(Paste my CSS that you see earlier in this post).
</style>
If you are on Blogger, paste all of these into your template.
OR...
If that’s too much work for you, just paste the following (which will pull the Javascript and CSS from my server. Again, I recommend that you copy and paste instead, just in case my server is down):
<script type="text/javascript"
src="http://jqueryjs.googlecode.com/files/jquery-1.3.2.min.js">
</script>

<script type="text/javascript"
src="http://public.cssrule.com/treats/cssbakery_captions.js">
</script>

<link rel="stylesheet" type="text/css"
href="http://public.cssrule.com/treats/cssbakery_captions.css" />
STEP 2
Once the Javascript is in place, you can write an img tag as usual, except by specifying the class name "cssbakery_caption", it will be transformed into a captioned image by the script. In your image tag you will put the path to your image file (src attribute), and the text describing the image into the alt attribute (this text will become the caption text).
In the class attribute you can also enter the color of the caption background (if you don't specify a color, the tool will choose black as a default - it will come out looking gray due to the opacity). You can also use a special class name, "cc" to cause the script to center the image. So, here's an example of what goes into your markup (Blogger users: Posting/Edit Post or New Post).
<img class='cssbakery_caption white cc'
src='earth.jpg'
alt=Blue Planet: Countries from three different continents, surrounded by Mediterranean,
Black, Red Sea, Pacific and Indian Ocean' />
The class "cssbakery_caption" is followed by the color for the transparency. For color, you can use keywords such as white. You may also leave the color attribute out in which case the code will default to color black. Or you can write your own hex code directly - make sure not to forget the number sign that goes in front.
<img class='cssbakery_caption #9b61e2' .........
To make the color selection simpler, I put a few non-standard keywords together that you can use without having to cut and paste hex codes. The names are self explanatory I hope. They are medblue (#4084e1), tealblue (#3fbff4), marineblue (#3f3ff4), twig (#855434), eggplant (#5d2f4d), violet (#c261e2) and darkpink (#e261a4), all of which provide nice color contrast on photos when semi-transparent.
<img class='cssbakery_caption medblue' .......
An extra touch is to allow bold text for an introductory word or two before the caption text. This is of course very easy to achieve, enclosing the text in a pair of opening and closing strong tags will do. Since we are already writing a Javascript helper why not make it easier on the user by allowing them to indicate bold text with the use of a colon symbol? We will boldface any text that comes before the colon. That will be our understanding. No colon, no boldface. I think that's easier than having to fumble with strong tags.
You'll still be free to bold any other words within the alt string but those you have to tag them yourself with strong.
Here's another example of our markup before Javascript gets to it. Note the colon after Blue Planet. Our script will boldface the portion of the text before the colon. This time our transparency color is a hex code which a tone of blue:
<img class="cssbakery_caption #4084e1 cc" src="earth.jpg"
alt="Blue Planet: Countries from three different continents, surrounded by
Mediterranean, Black, Red Seas, Pacific and Indian Oceans" />
Last example is markup that uses one of our color keywords. The keyword violet is mapped to a hex code by our Javascript and passed onto the transparency box.
Initial markup:
<img class="cssbakery_caption violet cc" src="earth.jpg"
alt="Blue Planet: Countries from three different continents, surrounded by Mediterranean,
Black, Red Seas, Pacific and Indian Oceans" />
Same markup after Javascript processing:
<div  class='cssbakery_image_wrapper violet cc' style='width:421px'>
<img src='earth.jpg' />

<div class='cssbakery_transbox' style='background-color: #c261e2;
left:4px; bottom:4px;'>
</div>
<p style='left:4px; bottom:4px;'><strong>Blue Planet:</strong>
Countries from three different continents, surrounded by Mediterranean, Black,
Red Seas, Pacific and Indian Oceans
</p>
</div>
and, the result:
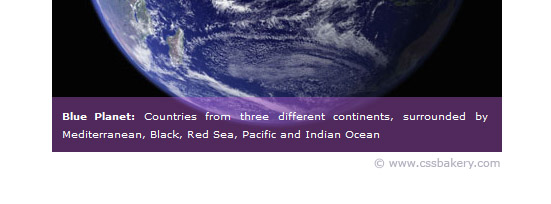
Image Credit: Earth from Space by NASA


Post a Comment
Note: Only a member of this blog may post a comment.