


If you are here because you want to learn how to create a png file in Photoshop, you don't need a tutorial like this. You can save your Photoshop work from the File menu with a .PNG extension which is all it takes to create one of those. If you want to make the layer(s) that you are saving transparent, then simply pull down the opacity slider down for your layer before your save.
PNG format represents an image as a two-dimensional array of colored pixels (dots). It's a raster format and not vector-based. Using PNG format frees you from patent fees but it has other advantages making it attractive as an image format. PNG compression does not lose any data and will not degrade image quality unlike JPEG. You can save a PNG file as a 48-bit color or 16-bit grayscale, image quality will not be degraded. Its gamma correction and two-dimensional interlacing are advantages over GIF. Its support of alpha channels allow variable transparency. While GIF format only supports simple transparency, a pixel can be either fully transparent or fully opaque, PNG allows up to 254 levels of partial transparency.
To create a PNG transparent single pixel bitmap in Adobe Photoshop, go to File Menu, from File/New, set width and height to "pixels". Enter 1 for both. Click "OK". If you want to see the close-up, Hit CTRL-Plus keys together until your file stops getting larger at 1600% magnification. You will have a pure white background.
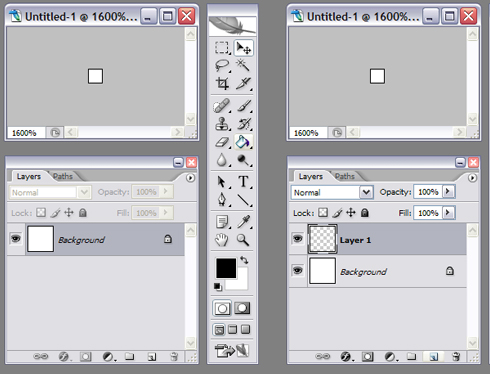
Add a second layer by clicking the new layer button (next to the trash can icon) which will give you Layer 1 with a grey-white checkered background.
Choose the paint bucket and "pour" black on the second layer. Finally, pull down opacity lever to 51% which will make the black layer semi-transparent. The checkered background will start showing through.
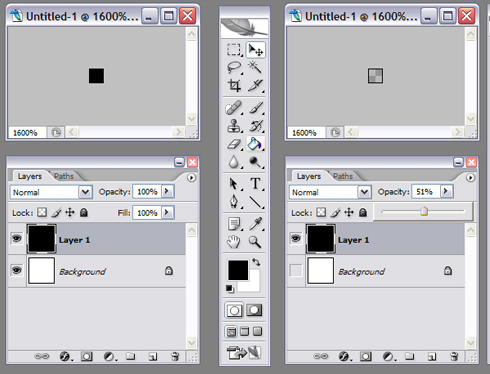
To save the file, uncheck the white background layer and save only the black layer. From File/Save As, choose .png as File type, and "none" for interlace option.


4 comments:
I followed all the steps carefully but it isn't working.......!
But thanks for your coordination
Hi, I added two new paragraphs to the beginning. See if that helps you.
Thank you so much for this info (which I somehow could not get from Adobe's help) on how to create a simple, partially-transparent PNG file!
FYI: If you're too lazy to create the pixel with Photoshop there's an online semi-transparent pixel creator. See http://px64.net
Cheers, Manuel
Post a Comment
Note: Only a member of this blog may post a comment.